When you make the decision to start brewing coffee at home what you need first is brewing gear. Sometimes buying brewing gear can get confusing because there are so many options in the market. This is why we wanted to present to you a comparison between three popular brewing devices. These devices are the Kalita Wave, the V60, and the Clever Dripper. The reason we are comparing these three is that they are visually and technically very much alike.
So how can you decide which one is best for you? To answer this question we will first explore the history and design behind these three brewers. Then we will compare them as brewing methods and highlight the similarities and differences. We will also look at other aspects such as their price, their overall ease of use and some best practices to get the best use out of them. Our aim is to give you a brief overview that will help you decide which one of these is right for you and how to use them in the most optimal way in order to brew a delicious cup of coffee.
Brief History
An interesting fact that these three brewing devices have in common is that they were all invented in East Asia: the Kalita Wave and the V60 in Japan and the Clever Dripper in Taiwan. The V60 was invented by the Japanese company Hario. Hario was founded in 1921 in the city of Tokyo and its main production involved glass for physical and chemical use. Their first coffee invention was a filter coffee siphon, which was followed by a cloth filter coffee siphon.
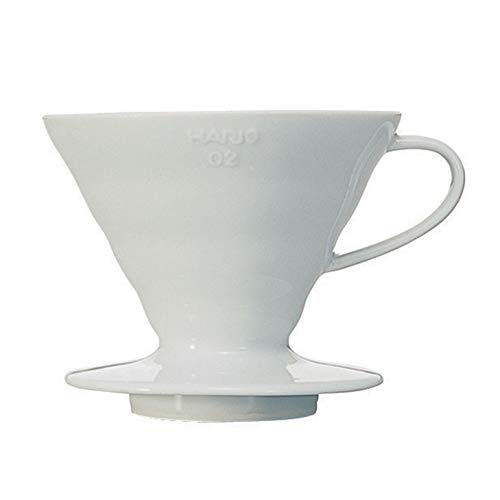
Hario V60
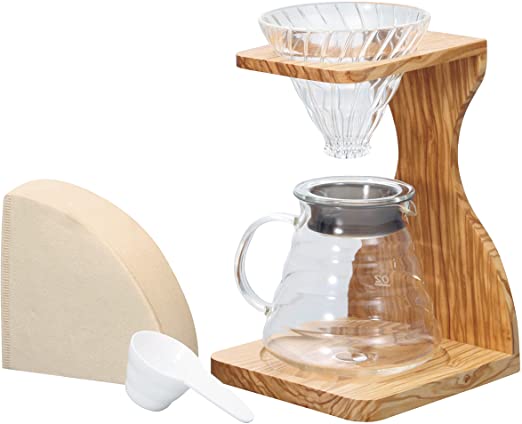
Then, in 2004, Hario revisited the design of one of their prototypes for brewing coffee which led to the completion of the V60 design. The name was inspired by its shape, the 60º angle of its cone. The spiral ribs of the V60 ensure that the paper filter doesn’t touch the edges of the cone directly, which leads to a better bloom. Furthermore, the hole in the center of the V60 allows more contact between the hot water and the coffee grounds, which leads to a more even extraction of the flavors and aroma of the coffee.
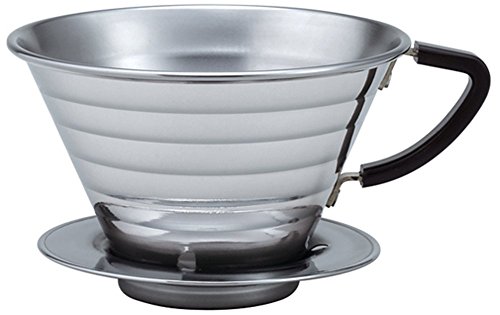
Kalita Wave
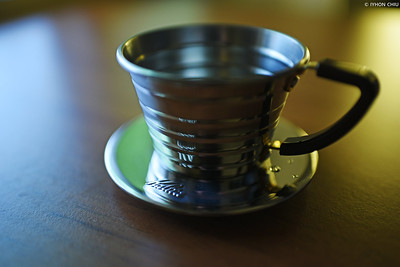
The Kalita Wave, like the V60, is another manual pour-over brewing device. It’s owned by Kalita Co., a family-owned Japanese company. The company has been making coffee equipment for a few decades now, but their Kalita Wave brewer is definitely their most popular product within the coffee industry. The Kalita Wave features a flat bottom surface with three holes for extraction. This makes it different from the V60, which features a conical shape and a singular hole. These three holes minimize any water channeling during the pour which results in a clean, bright cup of coffee.
Clever Dripper
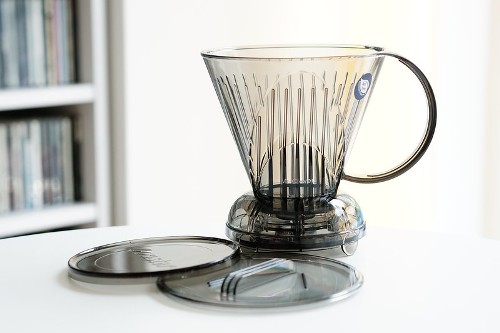
The Clever Dripper on the other hand might seem similar to the other two due to its shape but it’s actually an immersion brewing device. It was invented by a Taiwanese company a couple of decades ago and has become very popular with coffee professionals because of the element of control over the brew. Its shape is conical, much like a V60, but there is a valve on its bottom which doesn’t let the water go through until you’ve reached the desired brew time. All you have to do after that is place the Clever Dripper on top of your decanter or mug to open the valve and your coffee will be ready.
Hario V60 – Kalita Wave Brewing Guide
When it comes to brewing, there is not much difference between the V60 and the Kalita Wave. The result of your cup will be affected by the difference regarding their design, by your grind size, and by the water flow. The fact that the V60 has a conical shape and a large single hole in the middle allows for the water to gather directly at the center. If you change the speed of the water flow, this will also change the flavor of your cup of coffee. If you want a full-bodied coffee, add the water slowly but if you want a clean, lighter cup then add the water faster.
This process is different from the Kalita Wave because its bottom is flat and features three smaller holes. These two features allow for better control over the brew since the water is distributed more evenly at the bottom. Additionally, the grind size you choose will affect the brew. Whether you are using the V60 or the Kalita Wave, if you grind fine, then the water won’t go through the bed of coffee that easily which will result in a full-bodied cup of coffee. But if you grind coarse, you increase your chances of light and crisp cup.
Brewing Steps
So, depending on how you enjoy your coffee, you will need to adjust the water flow and the grind setting. Other than that, the steps for brewing the V60 and the Kalita Wave are pretty much the same:
- Heat your water between 90º to 95ºC
- Rinse the filter with the hot water and place it in your preferred brewer
- Measure 16g of coffee beans and grind them
- Place your brewer on your mug and that mug on your scale
- Add the coffee and get ready to pour, aiming for 250 ml in 2:30 minutes.
- For the first pour add double the amount of water to coffee. This step is called the bloom. Let it bloom for about 30 seconds and continue pouring until you reach 250ml.
Clever Dripper Brewing Guide
When it comes to the Clever Dripper, the secret is in the name: it’s clever. It is evident that its designers wanted to come up with a brewing device that would bring together two brewing methods, the pour-over, and the immersion. Its shape resembles other popular pour-over methods like the V60. However, the draining valve at its bottom traps the coffee and the hot water in the brewer, much like a French Press. Unlike the French Press though, the Clever Dripper comes with paper filters that don’t allow for sediment.
So, you still get a heavier coffee than you would with the V60 or the Kalita Wave, but unlike the French Press, the Clever Dripper results in a clean cup without sediment. It is undoubtedly a clever design, which is why it has become so popular. Here are the steps for brewing with it:
Brewing Process
- Heat your water between 90º to 95ºC
- Place the filter in the Clever Dripper and rinse it with hot water
- Drain the Clever Dripper by placing it on top of your mug. This will preheat your mug as well. Empty your mug.
- Measure 23g of coffee beans and grind them using a medium-coarse setting.
- Place the Clever Dipper on your scales and add the ground coffee.
- Pour 340ml of water and place the lid on the brewer. Let it sit for a minute.
- After a minute, give it a stir and place the lid back on.
- Once you’ve reached the desired brew time, remove the lid and place the Clever Dripper on your mug.
- Once it stops draining, your coffee will be ready.

- BPA-free plastic
- 18 fluid oz. max capacity- Large sized
- It's 5" tall, 6" wide and the top opening has a diameter of...
- Shut-off valve design holds the coffee until the brewing...
When brewing with a Clever Dripper it’s advised to choose a medium-coarse grind setting. The reason you grind coarse is that when the grounds are immersed in the hot water will be able to extract for longer. If you use a finer grind setting this will lead to over-extraction of your coffee. However, the medium-coarse grind setting will slow down the extraction process by making the coffee grounds flatter and thus achieve an ideal extraction.
Additional Information
Material: The Clever Dripper is made from plastic material, but the V60 and the Kalita wave come in different styles: copper, ceramic, glass, and plastic. Depending on which one you choose to buy, it might take longer to preheat.
| # | Preview | Product | Price | |
|---|---|---|---|---|
| 1 |

| Hario V60 Plastic Coffee Dripper, Size 02,... | $11.50 $9.99 | Buy on Amazon |
| 2 |
| Hario V60 Ceramic Coffee Dripper Pour Over... | $37.99 | Buy on Amazon |
| # | Preview | Product | Price | |
|---|---|---|---|---|
| 1 |
| Kalita Wave 185 Drippers | $44.00 $39.95 | Buy on Amazon |
| 2 |

| Kalita Wave Pour Over Coffee Dripper, Size... | $27.00 $25.52 | Buy on Amazon |
Price: Since the Clever Dripper comes only in one style and size, its price remains constant, about 25 USD. However, the price of the V60 and the Kalita Wave varies depending on their material, size, and additional gear that come with them, such as a decanter. You could spend an amount between 20 – 100 USD.
Kettle: It is highly recommended that you invest in a gooseneck kettle if you want to brew your coffee with these three brewing devices. The unique feature of such a kettle is its long and curved spout. It allows you to control the speed and accuracy of your pour with minimal effort.

Final Thoughts
Today we compared three very popular coffee brewing devices. The reason we compared these three is to highlight their differences because at first glance they look very similar to each other. Sometimes the difference is in the small details, and these details can change the result of your brew completely.
Hopefully, you now have an idea which one might be the best one for you. It’s important to remember that if you change even one variable during the brewing process, the end result might be different. This is why brewing coffee can be a creative adventure. As always, we encourage you to experiment with these brewers. Brewing coffee doesn’t always have to be right or wrong. If you let it, it can be a lot of fun. Happy Brewing!