If you’ve ever had a coffee station at home, you can attest to the fact that creating your daily cup of caffeine can often be a very personal process. You might have your favorite brand, your loving mix flavors, and your preferred level of intensity. You’ve probably got particular steps that go in a particular order that could seem downright bizarre to an onlooker.
Ever so often something surfaces or resurfaces in the coffee community that sends ripples throughout the global clique.
One such example is the Clever Dipper.
Maybe you think you’ve seen it before, or maybe you’ve got it on your kitchen countertop. If you’ve never heard of its existence though, we’re here to give you the low-down on How to use a Clever Dripper.
What is Clever Dripper
If you are in close contact with coffee consumers, you’ve definitely had a few feuds over what apparatus is the key to preparing the perfect cup of coffee. While each invention has its own merits and flaws, you could have faced the problem of being spoiled for choice.
The first step for any new creator is to pick between manual, semi-automatic, or automatic.
If you have decided to lock in a more hands-on method, you have to choose between pour-over, plunger, and percolate.
The options seem limitless. It’s easy to get a little lost.
Luckily for us, in walks the Clever Dripper; with an offer that no consumer can refuse. A two for one.
The Clever Dripper, a single cup filter is a contribution towards the coffee market of the world from Abid; a manufacturing company in Taiwan that was known for manufacturing household kitchen and decoration products.
The method it will have you using is called the steep-and-release. The technique flawlessly melds the benefits of the pour-over and immersion styles of brewing. It achieves this courtesy of the licensed valve at the bottom of the brewer that allows the coffee to be comfortably immersed and brew till you are ready to draw it out. Made from BPA-free Tritan plastic, the dripper comes in two sizes both are compact and portable making it the perfect coffee travel accessory. It’s a type of pour-over coffee maker among the many types.
The Clever Dripper allows coffee enthusiasts control, comfort and consistency every time they brew.
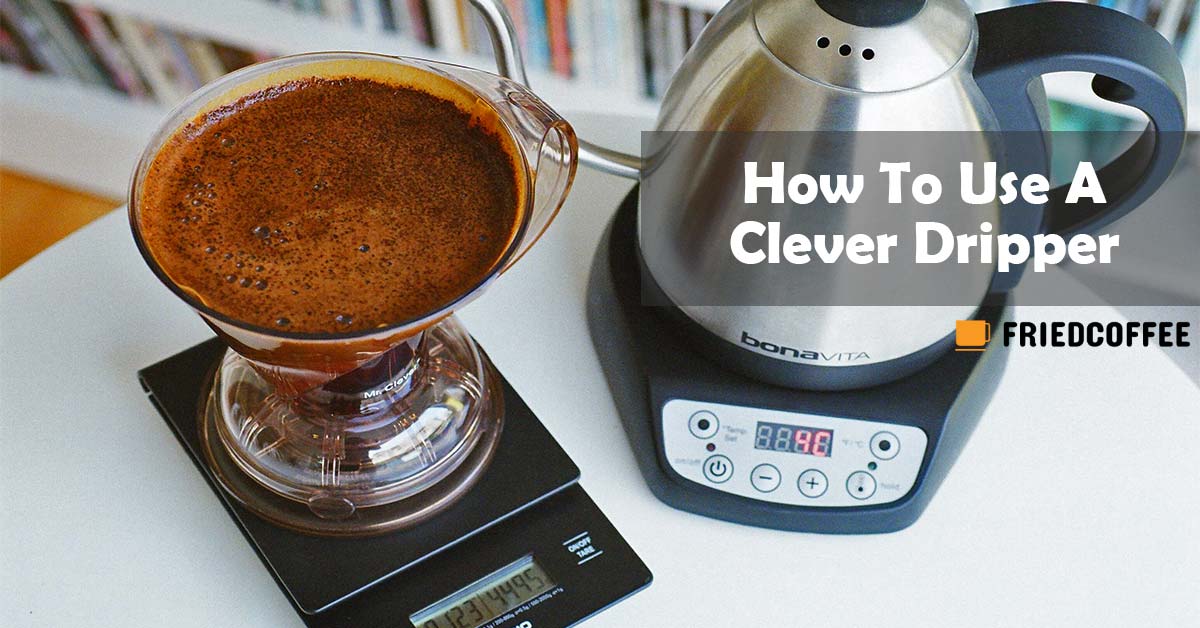
How to use a Clever Dripper
Once you’ve understood the where and the what, it’s time for the how. The Clever Dripper while simple in styling, is also fairly easy to use. Once you’ve taken the plunge and brought one home, it doesn’t take long to master.
What you will need
- Kettle filled with roughly 400 grams of water boiled to approximately 94°C – While in theory, any kettle will do the task admirably. Pouring from a gooseneck kettle does make a difference. It offers noticeably more control over not only the rate at which the water flows but also the direction in which you wish to pour the water.
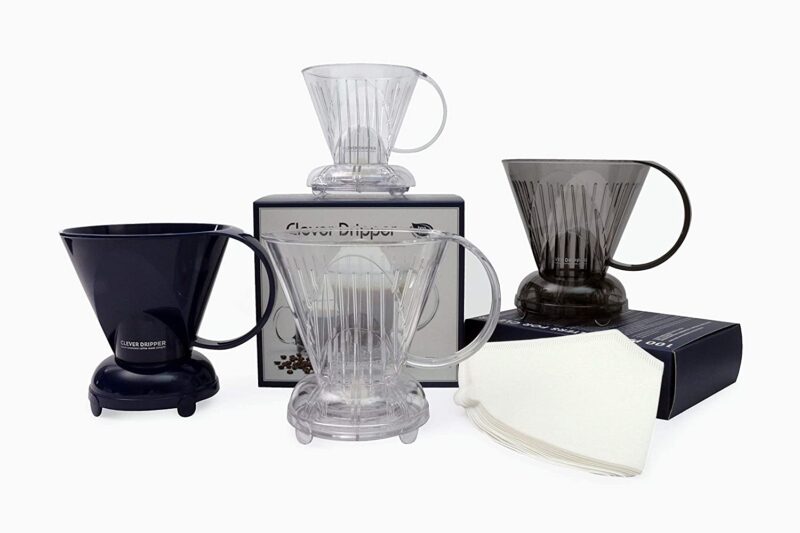
- The Clever Dripper – Choose whichever size and style suit your household needs. Just make sure it has its coaster and lid as well.
- Coffee – This ingredient should probably go without mentioning. Have a bag of your favored coffee beans ready. If you cannot gain access to whole beans, opt for the pre-ground option. The fresher the beans in your bag are, the better your coffee will taste so don’t forget to have a peek at the best by date on the pack.
- Coffee Grinder – If you manage to get your hands on whole coffee beans, you’re going to need a grinder in your kitchen. For the best result, it’s smart to get yourself a burr grinder. It will offer more grind settings to choose from, and also guarantee consistency each time.
- Coffee Filter papers – Make sure you have the right sized filter papers for the dripper you are using. #2 filters for the smaller Clever Dripper and #4 for the larger one.
- Digital Scale – If you’re aiming for precision when you brew. It would help to have a kitchen scale ready to weigh out your ingredients before they are added in.
- Timer – You’ll find a timer helpful to monitor how long each step of the process takes.
- Stirrer or Spoon – As easy to forget but an important tool is required each time you brew.
- Coffee Mug – The cup you have reserved for your caffeinated cravings. Be sure the Clever Dripper can sit comfortably over the cup of your choosing.
Clever Dripper Brewing Step-by-Step
- Position your Dripper – Start by placing your Clever Dripper on your countertop in a comfortable position.
- Take the hold of filter paper – Get a hold of the filter paper and fold it well along the edges so that the seams are on the same side and place it comfortably inside the Clever Dripper. If you find the filter not fitting in the brewer properly, try again after folding in the bottom and side of the paper.
- Pour hot water onto the filter – Now pour out some of the boiled water from your kettle onto the filter. Make sure you wet the filter properly before you have to place the coffee grinds in. This is mainly done to expel any papery taste from the filter before you brew. It also works to get the filter to sit firmly and warm up the dripper. Drain the water through into your mug and throw it away.
- Prepare your beans for extraction – Next, it’s time to shift your attention to the coffee. If you’ve managed to source whole coffee beans (We suggest going for coffee subscriptions) it’s time to grind them. Grab your kitchen scale and weigh out between 22 to 24 grams of coffee. Place them in your grinder and get to work grinding. Aim to get your coffee grinds to a medium to coarse texture. If you find this quantity a bit excessive for your tastes, adjust it down the next time you brew.
- Put the coffee grounds into the filter – Place the ground coffee into the filter in your brewer. If you’re using already ground coffee beans, simply place them into the wet filter. Shake the grind around so that the base is flat.
- Place the brewer on the scale – Once done, place your brewer on the kitchen scale and set it to tare (zero). Ensure the coaster is clicked in nicely to avoid any unnecessary leakage. (Would you like to know about Which is the best coffee scale?)
- Start the timer and pour water – Start the timer and slowly pour in roughly 75-100 grams of water over the grinds. Do your best to move in a circular motion to ensure all the grids are evenly wet. If you want to, you can give your grinds 15 seconds to bloom. This is when the grinds will expel any pent-up carbon dioxide that got trapped in while roasting.
- Pour the rest of the water – Next pour in the remaining water, close to 245 grams if you want to be precise, and close the lid to ensure the heat isn’t escaping. You don’t have to be too careful here. Go as fast as you like, just don’t burn yourself. Let it sit till your timer hits two minutes.
- Break the Crust – By now you will have noticed a crust form over the top layer of your coffee. Lift the lid, grab your spoon and break the crust. Move the spoon around forwards and backward four to five times. While it’s important to not get over-excited, do try and move the grinds around a little to get the most out of them.
- Grab your coffee – Once done place the dripper onto your coffee mug to activate the drawdown function. This step can take anything between 1 to 1.5 minutes. Once all the water has passed through, sit back and enjoy your cup of coffee.
Before you do though, do not forget to throw away the used filter, but you can use your coffee grounds cleverly for plant manure and many other uses. Wash out all the instruments that went into constructing your coffee and wipe down the surface used.
About Clever Dripper Filter Papers

One of the key aspects that helps the Clever Dripper stand apart, is the fusion of two coffee brewing techniques. The filter paper used is one of the key elements of the entire process. Since an important and unavoidable step in creating your cup of coffee using a Clever Dripper is wetting the filter paper before you brew; it is important that the paper you choose to use isn’t too thin or it will tear away in the process of brewing.
Though you can source it from a place of your choice, aim for an oxygen bleached, chlorine-free filter to ensure nothing harmful interferes with the flavor of your drink. If you find yourself and a loss over the company, Filtropa Paper Filter has both #2 and #4 sizes. Imported all the way from Japan, the filters have been accepted by the international food and drug administration. If for any reason you cannot get your hands on them, Moccamaster and Melitta coffee filters will also work with the Clever Dripper.
How to Clean a Clever Dripper
Cleaning up afterward is every single soul’s kryptonite. It is the least favorite element for most creators. It is ironically also one of the most important. Proper cleaning and upkeep of your coffee station and all the elements it holds is a sign of a true caffeine connoisseur. If you have everything clean, dry, and stored the right way you, increase their lifespan and ensure you’re receiving the ideal result every time you brew.
When it comes to the Clever Dripper the good news is, you don’t necessarily have to give it a proper washdown every single time you brew. While it definitely can’t hurt if you do so, just don’t let it be something that drives you crazy. Once you get rid of the used filter, it is however very important that you wash it out with water, preferably hot water after each use. Like you would with any dish you use, wash away any grime or coffee stains that might be stuck to the cup after you brew.

All in all, cleaning your Clever Dripper is a very no-frills experience. Whatever kind of soap you use, just be sure if you remove all traces of it before you brew so that it doesn’t alter the taste of your drink the next time you reach for the dripper. An important thing to take note of. The Clever Dripper is not dishwasher safe. If you want to simply plop it in there and expect the dishwasher to take care of all the cleaning, you’re going to be left with a damaged product.
If you find the Clever Dripper dripping water when it shouldn’t be, AKA leaking. It could be a small issue that can be fixed simply by taking off the gasket by pushing down carefully and looking for any rogue coffee grinds that might be causing the issue.
FAQs
The coffee doesn’t stay hot as there is no heating element in the Clever Dripper. Once brewed, the coffee will begin to cool down if left sitting in the open.
The texture of the grind is a key element that affects how fast or slowly the water will pass through into your mug. If the grind is too coarse, the water doesn’t really face too much opposition from the coffee and doesn’t take too long to flow through. Alternatively, if the coffee is too fine, the resistance is too much and the water takes longer to draw down into your mug.
While you’re free to choose your favorite blend of flavors in a decaf of light roast, the Clever Dripper has been proven to extract the best out of a medium to dark roast.
The acidic taste in coffee is usually present when you don’t allow enough time for your coffee to bloom. If the beans you’ve sourced for your drink are relatively fresh, chances are they have a percentage of carbon dioxide locked within that needs to be let out before you brew. Give your coffee 15-30 seconds to bloom and taste the difference.
What it all Boils Down to
Like with any creation, trial and error play an important role in the road towards perfection. You’ll probably come across many people offering varying tips and tricks to make that cup of coffee come just a little closer to perfection. The key is to understand that perfection would be different for different people. The Clever Dripper gives you more freedom than most other devices to control individual elements before and while they combine. Don’t be shy, flex a little, try a few combinations before you find the one that’s yours. And most importantly, have fun when you do.