Everything about siphon coffee is cool. The equipment looks great and watching the brewing process unfold makes things all the more visually stimulating. Brewing coffee with a siphon is an art, perhaps one more exacting than other coffee brewing methods. It’s also sometimes replaced with the term ‘Syphon Coffee Pot’ or ‘Vaccum Coffee Pot’.
It takes some time and practice to get it right and yet; it’s gratifying to go through all that trouble. Brewing siphon coffee can look something like a chemistry experiment, given the arrangement involved. And perhaps it is exactly that. And that’s one reason why brewing the coffee is as fun as enjoying the cup of joe.
Siphon Coffee Basics – A Few Things To Know
Here’s your guide to brew with a siphon. While the exact process can vary with the model and construction of the siphon coffee maker, few generalizations can be made that fit all models. This guide intends to take you through the specifics involved.
Let’s clear the terminology before moving further. And by terminology, I mean listing the popular names of this brewing method. Siphon coffee is also known as siphon coffee, vacuum pot, and vac-pot.
Siphon coffee used to be very popular, especially in cafe brewing. Eventually, simpler methods appeared and the siphon seemingly went off into the sunset. Then came the resurgence, renaissance, or whatever you’d like to call it, and Siphon Coffee started its comeback around 2007.
It’s been on a steady upward trend since. Nowhere near its original popularity, but still pretty strong. The current wave is fuelled as much by the aesthetics of the coffee maker along with the quality of the brew it prepares.
Everything Starts With The Right Coffee And Grind
Good coffee, technique, and coffee brewing equipment come together to make the perfect cuppa. It’s always a good idea to use quality beans with your preferred roast. Grind coffee beans right before you’re ready to brew and grind only what you need.
Coffee is more flavorful when freshly ground. As a general rule, use your freshly ground coffee within 20 minutes of grinding it. Using pre-ground coffee isn’t a terrible option either, but freshly ground coffee is more flavorful.
Besides, if you’re brewing in a vacuum pot, we can safely assume that you do pay attention to flavor and the finer aspects of the art of brewing coffee.
The recommended grind for siphon coffee is medium-fine. That means the grain size will be slightly smaller than the one you use for brewing conventional drip coffee. It is worth the effort to fine-tune the settings on your grinder to go for the ideal grind size. Most burr grinders come with options to make small adjustments to the grind size.
As with several other coffee brewing options, you will want to adjust the grind size until you find one that works best for you. The brewing method and personal preference play an equal part in this. Even if you find the perfect grind on the first try, don’t be afraid to experiment and experience more flavors and the effect grind size has on the brew.
Siphon Coffee Pot Construction And System
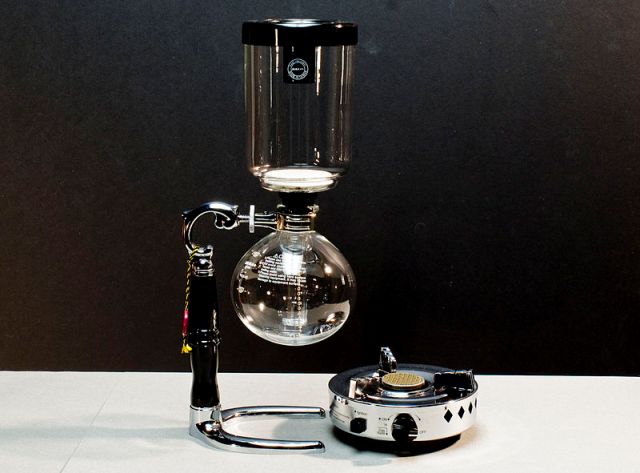
Brewing coffee in a vacuum pot looks like a rad chemistry experiment with delicious results. It’s almost Steampunk-ish, which should fit, considering the Siphon is a mid-19th century invention. As such, coffee brewing is a bit complicated compared to most modern methods.
The siphon likely isn’t your go-to coffee maker for the morning brew. Instead, this is the coffee maker you take out when you want a cup of siphon coffee. And yes, the brew is unique and delicious enough to keep an extra coffee maker for this type of coffee. Siphon vacuum pots are excellent conversation starters when you’re hosting a party or have friends over.
Any siphon coffee maker has these basic components:
- Bottom container
- Top container
- Siphon/syphon
- Filter
For siphon brewing, the bottom and top containers don’t need to be piled one on top of the other. These are more like naming conventions, rather than build descriptors.
How Is Siphon Coffee Brewed? – The Science And The Process
The brewing process of the siphon is as fantastic as the general look of the coffee maker would indicate. It’s every bit the “rad” chemistry experiment, as described earlier.
But how does it really work?
One of the names of this coffee brewing process is vacuum pot. It’s more descriptive as to the actual process involved. Water is added to the bottom container, which in turn is connected to the upper container through a small tube called a siphon. Yup, you figured it – this tube is the key to the process and thus gives its name to the siphon brewing process.
Coffee grounds are added to the top container.
A flame (usually a butane burner) is applied to the bottom container. As the water begins to boil, it has nowhere to go except follow the siphon and reach the upper container.
Eventually, heat is withdrawn from the lower container. Now the loss of heat and vapor in the lower container creates a vacuum. This, in turn, acts on the upper container and sucks in the water-coffee mixture back to the lower container.
Given the direction of movement, the mix this time has to push through a filter. The filter blocks the coffee grounds from falling into the lower container. Once the process is complete, the lower container now has your brew.
Below is the step-by-step guide to brew using a Siphon Vacuum Coffee Pot.
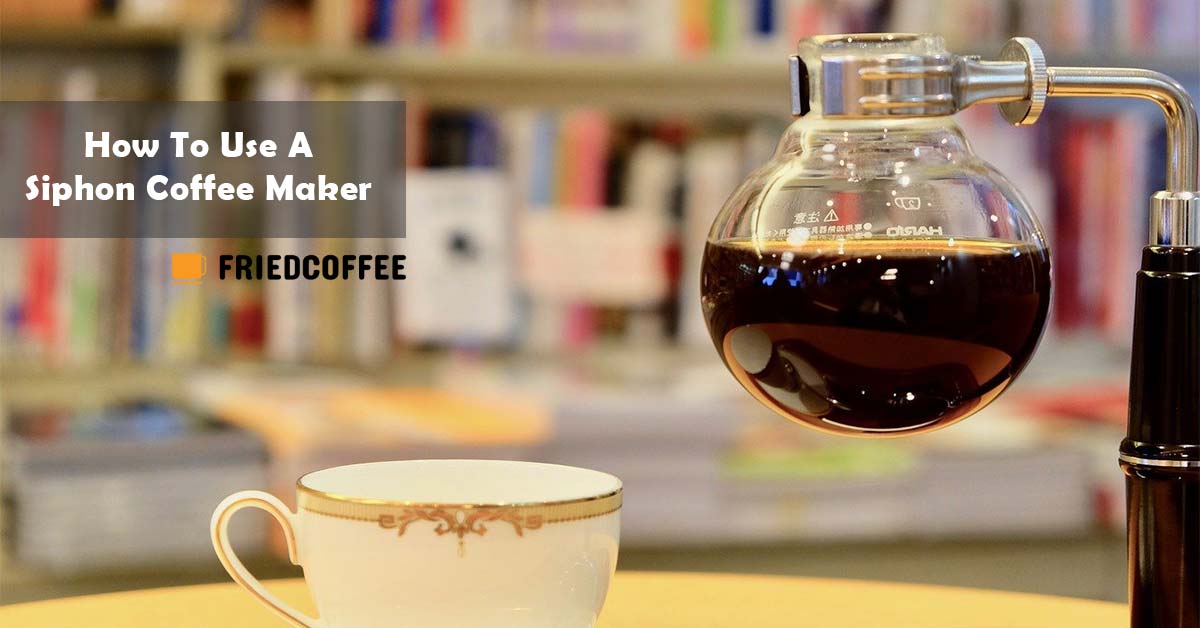
How To Use A Siphon Coffee Maker [Vacuum Pot]
Step 1: Setting Up The Siphon
Attach the lower container to its place (depending on the model of your coffee maker). We won’t attach the upper container yet, but it’s still useful to complete the associated steps. This includes preparing the filter. That way, the container will be ready for action right when we need it.
If you’re using a fabric filter, drop it in a warm water bath and let it stay for about five minutes. Metal and plastic filters don’t need this step.
By the way, if you’re using plastic filters, you’re doing it wrong! If your coffee maker is one of those that have plastic filters, see if you can replace it with a fabric or metal filter. Some machines use paper filters, which is good too.
Personally, I’d pick fabric filters or paper filters. Metal filters are acceptable too, though not the top choice. Plastics get a big no.
Step 2: Measure Out The Coffee Grounds
Conventional wisdom is to add 1.6 – 2 grams of coffee for every fluid ounce of water. This isn’t a rule set in stone, so feel free to adjust the coffee amount to your preferences. Although this is a good starting point. Having a kitchen scale to measure out your coffee is a big help.
Keep in mind, we’re only measuring out the coffee grounds right now. We won’t add them to the hopper just yet.
Step 3: Add Water
For siphon brewing, it’s better to make some adjustments to the water you’re adding. The most convenient way to go about it is to add warm water. Filtered water is the best option.
You can start with room temperature water as well, but it can take way too long to heat and brew the coffee. Give the process a head start by using warm, or even somewhat hot water. There has to be a balance to things, so don’t add boiling water in the hopes that it will speed things up further. We want the water to reach the correct temperature in the coffee brewer.
Add slightly more water than the amount of coffee you want. This accounts for losses in the process of absorption by the filter and coffee grounds.
Step 4: Bring The Heat Source In Action
Start the heat source and place it below the bottom container (the one with water). Soon enough, the water will get hot, or even start boiling. Ideally, we don’t want the water to boil, so if it starts boiling, lower the heat to settle down the water.
If you have a kitchen thermometer, now is a good time to use it. The water temperature should be in the range of 195-205 degrees Fahrenheit, 200F is the golden mark. Once at this point, we’ll place the filter and upper container.
Step 5: Place The Filter
Placing the filter is the next step. Place it at the bottom of the top/upper container. Some filters can be placed at the bottom of the container. Others have a hook to ensure that they stay in place when they face the pressure of coffee filtering through.
If the filter has a hook, it will most likely attach to the bottom of the tubing of the upper container (hopper). Attach and check that the filter is secure.
Step 6: Place The Upper Container
Once the filter is in place, attach the upper container (hopper) to the siphon assembly. If necessary, twist it into position and ensure that the containers have formed a tight seal. We don’t want any vapor or water escaping through the joint.
Step 7: Let The Water Move
Soon, water from the lower container will be pushed through the siphon and reach the upper container. As the pace of water moving to the upper container accelerates, prepare to lower the heat source. If you’re using a butane burner, lower the flame to the minimum.
Lower it enough so that the flame is just visible. It will still give some heat to the coffee brewer, but not enough to raise the temperature.
Step 8: Add Coffee Grounds And Give It A Stir
Add the coffee grounds to the top container. Use a flat stirrer to give it a good stir. Immersion and stirring allow the coffee grounds to be saturated.
Stop stirring and let the coffee steep for 40 seconds to a minute. At this point, stir the grounds again. It’s time to wait for another 30 seconds to a minute.
Step 9: Remove The Heat
After the time is done, remove the heat source completely. Without heat, the lower container will begin to cool down and the condensing vapors will create a vacuum. Eventually, this will start pulling coffee from the upper container and push it through the filter.
Giving the mix another stir with the paddle as it starts to draw down will prevent coffee grounds from doming up over the filter.
Step 10: Enjoy Your Coffee
It usually takes 1-2 minutes for the coffee to drawdown. Once done, pour out the coffee from the container and enjoy your brew!
Wrapping Up – Perfecting Siphon Brewing
This guide to brew with a siphon intends to be a helpful resource on coffee brewing. However, keep in mind, coffee brewing is more about your personal preferences. Experiment and make adjustments to the process. Play with the grind and roast, and adjust the steeping time. Perfecting the brew means going beyond this guide and being comfortable with making a recipe of your own.