Everything that glitters is not gold, but every Nespresso coffee maker is indeed a convenience gizmo. Having it handy helps one in kick-starting the day with a classic cup of coffee, which carries the desired touch of perfection.
However, have you ever considered thinking about the well-being of your dearest Nespresso that produces those exotic cups and satisfies your otiose coffee craving whenever you want it to?
If not, then it’s high time to pause awhile and ask yourself, how often you clean this wonder device. Pampering your favorite Nespresso machine with the best possible cleaning and maintenance practices enhances its life and efficacy. This write-up acts as a comprehensive guide that helps you learn how to clean Nespresso and a lot of relevant facts. Good reading!
How Cleaning and Descaling Differ?
When it comes to maintaining Nespresso, understanding the differences between cleaning and descaling is imperative. Both of the methods are considered integral parts of the Nespresso maintenance routine; however, they are not synonymous.
What Does Cleaning Refer to?
Cleaning your Nespresso is a simple process involving a quick rinse cycle – post and before brewing. This helps you to clean up any residues of coffee grounds from your previous brews, thus, keeping the taste of your cups up to the mark.
On the other hand, if it’s about deep cleaning, you can use cleaning capsules which will assist in cleaning the inner components. However, if you follow the rinsing cycle with every brew, you probably won’t require cleaning capsules.
What Does Descaling Refer to?
When you keep on pouring water in Nespresso for an extended period, it may induce the accumulation of mineral deposits in the machine. If left unattended, it may clog up the device, and it may ruin your coffee experience as you’re probably going to sip cups with nasty flavors.
This is where descaling comes into play. Descaling refers to the process of removing the said mineral deposits using a specific acidic solution. When you descale your Nespresso periodically, you ensure the production of the best quality cups in every serving.
How To Clean Your Nespresso
Let’s take two scenarios – In the first one, you don’t clean your room every day, while on the other one, you do it regularly. It’s easily understandable how time-consuming and a daunting task it will be when you clean your room once a week. On the other hand, if you do it on a daily basis, it would hardly take a couple of minutes, rather than devoting your weekend to clean the mess.
Well, the same goes with your Nespresso coffee maker. If you clean it daily, it will minimize the requirement of deep cleaning and descaling at frequent intervals. Additionally, you will get to enjoy the maximum performance of your coffee maker in terms of taste and durability.
1. Rinse out
When you rinse your Nespresso before brewing, you not only free up your coffee cup from old residues but also help to warm up the machine’s components thoroughly. In addition, your cup gets heated up from the hot water, which helps keep your coffee warm while you drink.
Now, to pamper your machine, even more, you can rinse it after every brew. This helps to rinse out the particles very easily as the machine stays warm just after brewing. Therefore, you can rest assured that no oil or coffee residues are left behind to disturb the flavor of your upcoming brew.
Nespresso machines are capable enough to heat up and brew coffee in less than a minute. Therefore, adding just a minute extra to rinse the machine for its good won’t be something daunting enough, isn’t it? The steps involved are as follows –
- Fill the water tank with fresh water
- Turn on the machine without any capsule in it
- Once the machine is ready to brew, place your mug under the brew head
- Press the brew or lungo button on your machine and let your cup fill with hot water
- Dispose of the water and place your mug beneath the brew head
- Place your favorite capsule and carry out your regular brewing
- Once done, place an empty mug again and repeat the rinsing process while you enjoy your flavorsome Nespresso beverage.
2. Cleaning the reservoir
The task might seem daunting, but this process is advantageous enough for people who love their Nespresso and can’t comprise anything for its maintenance. It minimizes mineral buildups and the frequency of deep cleaning and descaling to a great extent.
All you would require to do is, empty the water reservoir, putting it under flowing tap water so that it gets rinsed well, and at last use a towel to dry it thoroughly. Perform this step daily once you’re done with brewing for the day.
3. Deep cleaning your Nespresso – Here’s how to do it
If you are someone who runs on tight schedules throughout the week, chances are you won’t be able to carry the daily rinsing process. Well, it’s pretty understandable, and you are not alone who follow a hectic lifestyle. In such scenarios, deep cleaning your Nespresso once a week is essential. Let’s learn the steps involved!
Start with the water reservoir
Take the reservoir out of your machine and empty it. Use warm soapy water and clean the inside and outside of the reservoir. Once done, rinse it thoroughly with warm water and dry it with a soft towel. Leave it for a while as it will air-dry the reservoir and prevent mineral buildup.
It’s time to clean the drip tray
Use soapy water to wash the drip tray and use a soft towel to dry it completely. In addition, you should keep cleaning the drip tray at regular intervals whenever you notice stains.
Move forward to clean the capsule collection drawer
Similar to the drip tray, use soapy water to clean the capsule container and rinse it well with warm water. Once done, use a soft towel to wipe it and help it shine.
Wiping the machine
Well, it’s not just the components, but the exterior of your machine should be shining as well, right? To do so, unplug the machine from the power socket and start wiping it gently with a damp cloth. Make sure that you don’t submerge the machine or the power cord in water, as the outcome is quite apparent.
Assemble them back
When all the components and the machine are clean and dried up, assemble them back to perform the final step.
A rinse cycle
With the steps mentioned above, you have successfully clean the exterior and few components of your beloved Nespresso coffee maker. Now, it’s time to clean up the inside. To do so, take a liter of fresh water in the reservoir. Choose a container that can hold at least a liter of water and place it under the brewing head.
Now, run four ‘lungo’ brew cycles of water for the original line. In the case of Vertuoline, press the brew button thrice to activate the rinse cycle. The process takes a few minutes, and once the machine brews hot water, dispose of it off. Congratulations, your machine is now appropriately cleaned and ready for the next brews.
Descaling your Nespresso – An integral part of maintenance
You wouldn’t ever want your Nespresso to deliver bland-tasting coffee or stop functioning, will you? This is why descaling your Nespresso coffee maker becomes inevitable. As per the company, it is recommended to descale your machine once every three months or if you complete 300 brews – whichever wins the race.
However, there are certain factors associated with the intervals you should have in descaling your machine. Mentioned below are the ones to consider.
- Amount of usage
- Frequency of deep cleaning
- If you rinse your water reservoir and machine daily
- Water supply (if it’s hard, it will carry more minerals)
Depending on these factors, you can choose an interval to descale your Nespresso. Though, doing it right before or combining it with your deep cleaning procedure isn’t a bad idea at all. Let’s check out the steps involved!
Get your machine ready
The initial step is to release the capsules and vacate the capsule drawer.
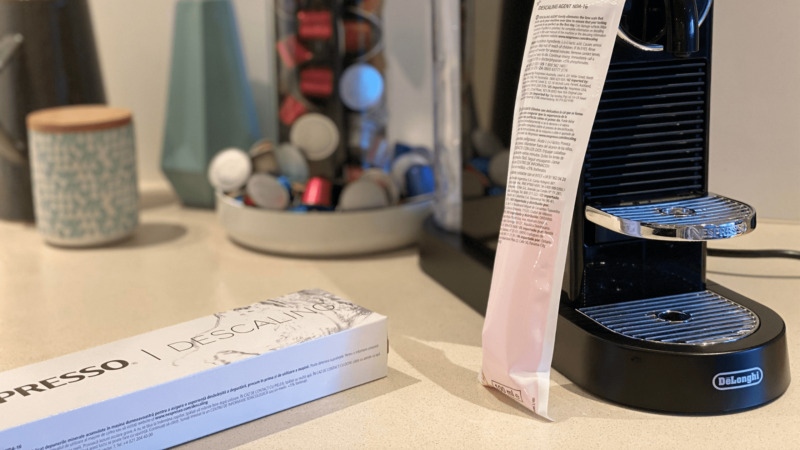
Bringing a desclaing agent into play
You can find plenty of descaling agents available online, and even Nespresso sells its descaling kit. Once you get one, add it to water in the reservoir as per the instructions on the product label. Opt for an appropriate size of the container and place it under the dispenser.
Run the cycle
Generally, a descaling cycle starts by pressing a button and lever simultaneously for three seconds. However, it may differ depending upon the model, so consider checking the user manual once as a guide to enter and proceed with descaling mode. The entire process takes around 15-20 minutes and would require some refills. Once the descaling process ends, you can use the same method to enter back to brewing mode.
A Rinse cycle – The final stage
Carry out a thorough rinse cycle after descaling your machine. This will clear off the left-behinds of the descaling solution, if any, and get your device ready for brewing a delectable cup of coffee.
Wrap up
So, that was all to keep up your Nespresso’s glory! Follow the recommended cleaning and descaling routine and enjoy boundless brewing!