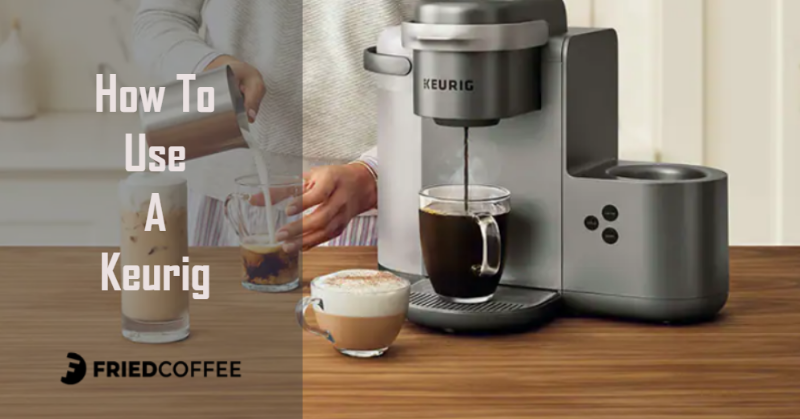
It won’t be wrong to consider Keurig machines synonymous with a great coffee experience. There’re plenty of reasons that have made Keurig deserving a place in almost every kitchen, of which magnificent brews stand foremost.
If you are someone who’s already smiling with the excellent product or have an intent to bring one home, this post got you covered! Learn the steps to use a Keurig Coffee maker and unleash its potentials to deliver those mouth-watering, flavourful cups of coffee. Let’s get started!
How to Use A Keurig Coffee Maker
Step 1 – Setting up your Keurig coffee maker
It’s always thrilling to unbox new gadgets, be it a coffee maker or anything else. However, for coffee aficionados, coffee makers tend to be more enthralling. Therefore, the first step is to unbox the machine and set it free from the adhesive tapes.
Find a proper place, probably with a decent space and a power outlet that would solely be dedicated to your coffee machine. What’s the reason behind this? Well, the chances are that you will be using this machine quite often, won’t you?
Now, it’s time to bring the coffee maker to life by connecting the cord to the power outlet. There you go! It’s all set to move into the next step.
Step 2 – Conducting a brew for cleansing
Before you make the coffee maker serve its actual purpose, ‘preparing exquisite coffee, ‘it’s essential to clean it from the inside. To do so, here are the steps to follow –
- Fill in the reservoir with water upto a level slightly lower than the maximum line.
- Grab a mug or container and place it under the dispenser.
- Now, it’s time to inaugurate, press the power button and let the machine turn on.
- Now, depending upon the model you are using, you might notice a heating light or maybe not. If your Keurig has a heat indicator that will let you know when the heating completes, or if there isn’t any, simply wait for a few minutes until the heating sound stops.
- Once the heating is complete, you will notice the brew size buttons lighting up. Go for the largest brew size and press the button accordingly. The reason to choose the maximum brew size is to ensure the best possible cleaning inside. Make sure the mug you have placed can hold the quantity of the largest brew.
- Let the machine dispense the hot water. Once done, take the mug and, of course, make it flow through the sink.
- Bingo! You are all set to brew your first galvanizing cup.
Step 3 – A variety of K-Cups to choose from
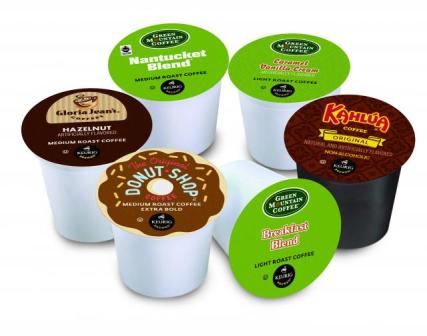
Keurig machines use K-cups, and there’s a wide variety to choose from. Make sure to do some research or go through your specific model’s user manual. It will help to select the K-cup which is compatible with your machine. However, if you are already handy with your favorite one, let’s move forward to the next steps.
You might like: Best Keurig K-Cups
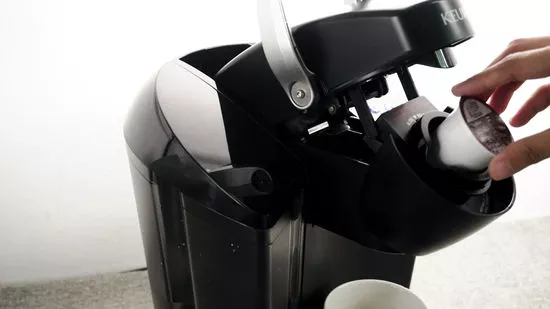
Step 4 – Fixing the K-cup to your machine containing your favorite coffee.
To fix the K-cup, lift the handle on your Keurig machine. Now, you will notice a capsule holder, and that’s where you need to attach the K-cup. While doing this, make sure that the capsule is in level, or else it will disrupt the machine’s piercing in the K-Cup.
You might like to read: Keurig Troubleshooting Guide
Step 5 – It’s time to brew
Woohoo! Now, this is the moment you’ve been waiting for, right? Take your mug and place it under the dispenser. It’s pretty understandable that you would like to go for a greater brew size to enjoy your first cup from this machine.
However, it’s suggested that you should select the smaller size. Doing so will give you an idea of the capacity of your mug and help you choose one accordingly from the next brews. In addition, add water only as per your brew size. This will ensure that you don’t come across a cup of coffee that’s watered-down and poor in taste.
All set? Move forward to select the smallest size as suggested and relax; the machine is going to rest of the work for you.
Keurig coffee – Tips for a better version of cups
Now that you know how to use a Keurig coffee maker, it’s time to imbibe some tips to improve your experience. Here we go!
Using packaged water can be a game-changer
Whether you have already or maybe you’re about to invest in these amazeballs – the Keurig coffee maker, It’s vital to consider the type of water you use for brewing. Hard water can play the role of an opponent for your coffee’s taste, which of course, you won’t want to happen.
Therefore, by any chance, if you live in an area with a supply of hard water, make sure you use bottled water for coffee. This will not only smoothen the taste of your coffee but also protect your machine from limescale buildings. Yes, it will add a little to your expense, but the word ‘compromise’ isn’t there in the dictionary for coffee enthusiasts.
Rinse the prince
Your prince, the Keurig coffee maker, gets dirty from the inside with every brew. The reason being old coffee grounds stuck to it. Now, would you ever like to drink your flavorful coffee from a dirty mug? Of course not, and similarly, you can’t let the beloved prince that helps you enjoy toothsome coffee whenever you want to stay dirty.
Therefore, it’s advisable to rinse your machine once you have removed the used K-Cup. In this way, you keep the machine clean from the inside and also minimize the chances of old ground coffee affecting the taste of your upcoming brew session.
A strong button adds more to perfection
When it comes to luck, you make your own, and when it’s about a Keurig coffee maker, you’re lucky if you have a strong setting button. The button helps infuse water into the coffee grounds for longer by slowing down the brewing process. This results in a smoother and full-bodied brew, thus, making you utter the word – perfecto!
End Note
So, this is how you use your Keurig and turn yourself into a perfect home barista who delights his/her loved one with wonderful cups of coffee every day!