
If you are a coffee aficionado, you definitely know the difference between an ordinary cup of coffee and a flavorsome cup of espresso. This is where you just have to let off your baristas, mainly if the irreducible unit of their job entails mixing variables, without factoring in the type of coffee beans, the roasting period, water pressure, or temperature, and the right grinding settings needed.
Imagine that you have adhered to all the steps of the recipe that typically point out a few of the essential things, but you still don’t achieve the 40 ml of consistent espresso. You have to agree that you need the right arms to wrap around the most sought-after recipe of making an espresso that will wet everyone’s palate. That’s probably why the barista next door has never pronounced your name correctly.
One factor that almost every coffee specialist counts on is that making espresso is not easy. But in this article, we have strived to make it graceful for you with our simple yet well-explained AeroPress espresso recipe. We have studied the process and mastered the art of coffee-making and have underlined the perfect recipe for obtaining the same quality of the espresso, each time we followed it. Our recipe presents one of the methods of espresso-making that a lot of coffee zealots fight duels over.
Well, if all our effort appears like a storm in a coffee cup, then coffee must be a high-stakes game that we must play, no matter the outcome.
How to make Espresso With AeroPress
If you have tasted espresso, you know well that it is difficult to reproduce the same quality more than four times. But some coffee enthusiasts have an AeroPress buried in their kitchen cabinets. An AeroPress is a great tool for brewing high-quality espresso without losing an arm and a leg. Let’s start brewing, shall we?
Things Required
The first stage will always entail bringing together all the necessary items and ingredients. The following are the things required:
- AeroPress – The espresso-making device.
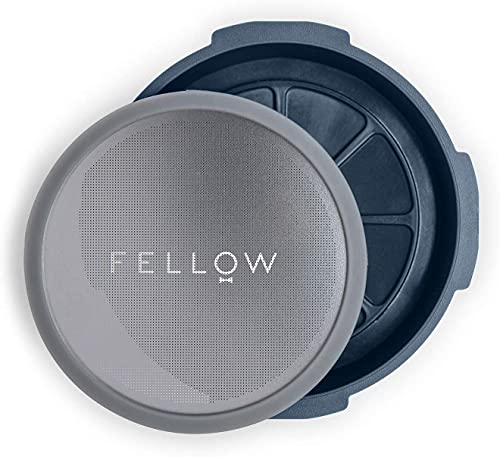
- Two AeroPress filters – These are filters that will sieve the soluble solids and remain with a creamy beverage.
- Espresso beans – This will be pressed to produce the coffee drink. You can take help from our Guide about the best coffee beans for espresso.
- Burr grinder – Used for grinding the coffee beans into fine particles.
- Weighing Scale for Coffee – For measuring the precise amount of coffee needed.
- A thermometer – Needed for maintaining the right temperature for optimum quality results.
- AeroPress tamper – It’s used for pressing the coffee grounds in the AeroPress device.
- Coffee kettle – This is used for holding the water needed for coffee-making.
- Mug – Used for pouring in the prepared coffee.
Step By Step AeroPress Espresso
The espresso-making process by using an AeroPress device requires following a systematic process. Follow these steps to make a mug of mouthwatering espresso.
- Grind the coffee beans – Start by grinding your coffee beans by using a bur grinder. You may use about 20 grams of finely grounded coffee beans. An experienced barista will tell you to grind your coffee beans until you achieve a floury consistency. Be careful, however, not to overdo, because this will create a blockage. You have to get it just right.
- Set up your AeroPress and put in grounded coffee – At this point, you need to prepare your AeroPress. Begin by putting one of your paper filters in the filter cap, depending on the type of filter that you prefer. Pour hot water through the filter to warm it a little and remove any trace of paper tastes. Then screw the cap and pour your coffee grounds.
- Press the coffee grounds – Upon attaching the filter cap properly, you need to put another filter on the top of your coffee grounds in the chamber. Dab the filter with some warm water, too, and press it to the bottom of your espresso tamper. Continue pushing the coffee grounds by using the AeroPress tamper to squeeze the liquid from the coffee grounds. With a little art, you can do some twists, and pressing without distorting the coffee grounds, you are a barista in the making.
- Add hot water – Boil water in the kettle to about 200ºF or 208ºF. Check by using a thermometer to ensure that this temperature has been achieved. Begin to pour the water in the coffee grounds in the AeroPress chamber, up to slightly above level 2.
- Press your espresso – Immediately you finish pouring the hot water, place the chamber on your mug of coffee, and input the plunger. Press the plunger down into the coffee grounds at the bottom of the chamber. Keep the AeroPress in place as you continue pressing the plunger. Continue with this process until you have squeezed the coffee grounds as much as possible.
- Get ready to enjoy – Upon finishing the squeezing process of at least every ounce of the rich caffeine-goodness, you can add any other extras that make your espresso even complete, such as milk. But if you love your espresso just like that, then you are done. Grab a chair and sit back and enjoy your homemade beverage.
Here is a video if you don’t like to indulge much with text.
How AeroPress Espresso Differs From Regular Espresso
Whether you are looking out for a caffeinated drink in the most convenient and less-expensive way, there are tons of options available for you. But if your primary objective is to get hold of the old and traditional cup of espresso, specially brewed and served, well, that could be yet another story. Indeed, the space-age AeroPress espresso is taking over, while the tang of the traditional espresso remains in antiquity.
AeroPress is defined as absolute feats of invention and engineering. Some will come with different components of boilers for maintaining the right water temperature. Some devices have a sophisticated pump system that can produce different levels of pressure in the water right at the press of a button. It is this pressure that leads to the formation of the highly-revered crema – and many coffee lovers are willing to die for it.
Whereas, the traditional espresso is considered a stronger yet richer coffee than the one produced by the AeroPress recipe of espresso. This traditional espresso is typically brewed from just a tablespoon of grounded coffee. Most of all, espresso is distinguished by its thick layer of foamy cream that is always referred to as crema. This frothy cream is produced as a result of the high atmospheric pressure, as part of its brewing process.
Espresso by an AeroPress comes in handy for people who desire to make a quick cup of coffee that tastes just like the traditional espresso. Some experienced baristas claim that coffee from this device is technically different from the traditional shot of espresso, but indeed the device doesn’t miss a thing. It manages to meet a lot of the distinctive attributes of espresso. Mainly, it is a filter-style coffee-making device that is convenient and portable. It is engineered to employ comparative amounts of pressure needed to produce a pure espresso, even though the quality of espresso has been under scrutiny from many espresso connoisseurs.
The Importance of Filters in AeroPress Espresso
The AeroPress coffee filters are essential items when it comes to brewing espresso. Expert baristas claim that selecting the correct filters for the AeroPress recipe will end up making or breaking your precious coffee mug. While one filter type may not be better than the other, the secret lies in the filter that will give you a great taste.
There are many types of filters, which include metallic and paper filters. The metal filters can have metallic mesh or a metal disk. The mesh or metallic disc can sometimes be coarse or fine. The design of the filter is the source of the varying tasting profiles – that is, if all other variables remain constant.
The filters are useful in getting rid of coffee oils, especially for a low cholesterol brew. However, the paper filter is ideal in getting rid of most of the coffee oils as compared to the metallic AeroPress filters.
The filters also help sieve all the fines (insoluble solids), leaving behind an extra-smooth and refined cup of coffee. This explains that super fine filters make a super-refined coffee as compared to coarse filters. This is why you have to spend more time when choosing the right AeroPress filter.
If you are not worried so much about the extra oils in your coffee, then metal filters can work for you. Moreover, metal filters help retain the rich taste of your coffee. The fines or the insoluble solids make your cup of coffee stronger.


But if you want to grab a cleaner, lighter and finer cup of coffee, then you can go for the AeroPress paper filters that permit even more pressure under the coarser grind. Merging this with the increased filtration capability of paper filters, you definitely end up with the finest coffee that will give you the much-needed oomph to start your day.
Wrap up
You can now make your espresso with an AeroPress and still enjoy a traditional espresso smack on a coffee budget.
Moreover, while the AeroPress espresso may not actually taste like the traditional espresso, you may work on a few critical factors, including following the recipe religiously.
Equally, you need to focus on brewing only freshly-roasted coffee beans. Don’t pick the coffee beans that have overstayed on your local grocery store shelf for weeks. This is how you can be confident that the difference between your AP espresso’s quality and that of the traditional espresso is faultlessly slim.
Hyper-fresh coffee beans are always full of the rich and strong flavor, and worth brewing.
What are you waiting for? Time to get your espresso pronto!