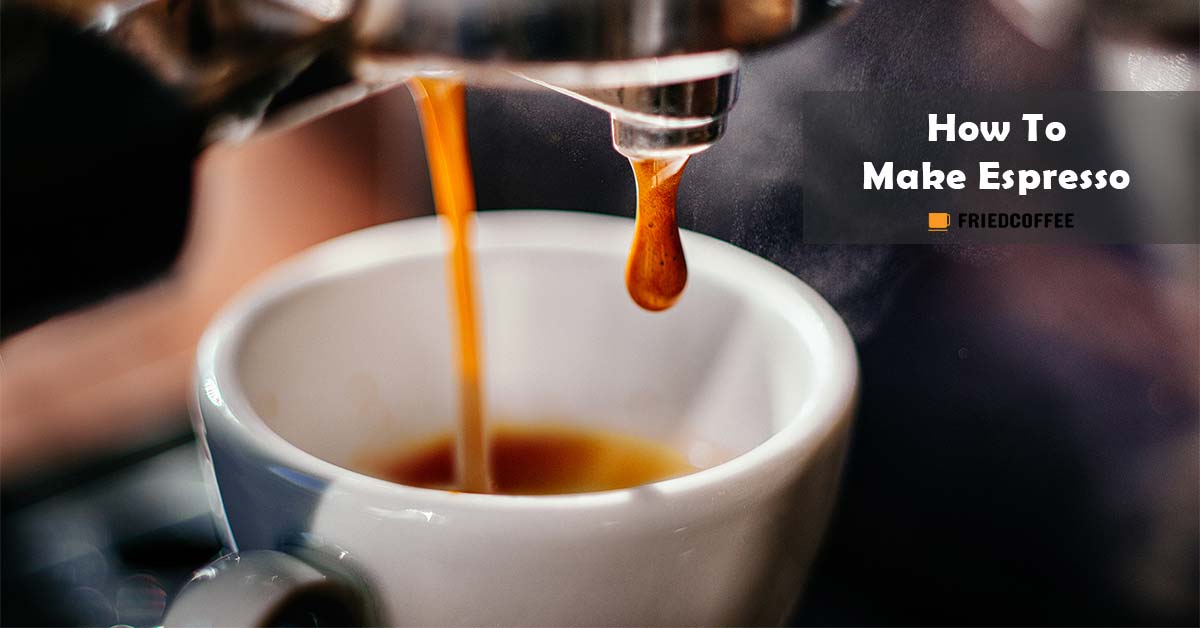
Espresso is not just a drink, but a gateway to many specialty coffee beverages we find in a cafe menu. If you feel some love for your coffee, this guide will teach you something very crucial – How to make espresso perfectly at home!
All the variables present in this article are important points to take into account when brewing for that fantastic shot. Making Espresso is excellent, as the drink itself is different and opens the path to so many other coffee drinks. With the right tools and preparation, the world of the espresso is rewarding, and being able to prepare a fantastic shot will be something you can brag about. Once you have mastered this skill, you don’t have a need to go to a coffee shop and pay a barista to do it for you.
So, how do we begin? How can this be so easily achievable? Well, let’s start with the basics and move on to the advanced. It won’t be easy and neither going to be tough, but once you get the hang of it, it will be natural.
Let’s first understand a little about the subject!
What is Espresso
Espresso was one of those things, and by the end of the 19th century, an Italian made this fantastic new way to prepare coffee. This method involved high-pressure steam to create “instant” coffee, and the result was something even better than instant coffee, that’s how the espresso was born.

Espresso used to be something expensive to make, you needed a specialized tool that was extremely expensive to be part of a regular kitchen’s equipment. Now, all coffee shops have their first equipment as the espresso machines, and even a lot of households have their own.
Many advanced machines have evolved from basic to amazing features. If you don’t have one, we even have an interesting tutorial – How to make espresso without a machine. It will guide you about the most appropriate methods without using an espresso maker. But, if you are serious about your espresso shot, we suggest getting one for your home.
Pulling an espresso shot is not as easy as it looks, you will need to take into account several things, and this article will show you exactly what to do.
How To Make Espresso
Things Needed
Let’s first take into consideration about the ingredients required along with some facts to take care of.
Water
Many people actually take water out of the equation and don’t really care much about it, but in the culinary world they say “With bad ingredients, no matter how good of a chef you are, you won’t reach an excellent dish!”. Water is the main ingredient and most vital when it comes to brewing regular coffee as well as espresso. Having good quality water will go a long way, as it may add odd flavors, that shouldn’t be there. Water test kits are cheap and easy to acquire, so you should always see what kind of water you are using and act accordingly, a simple filter can make the difference!
Coffee
Another most important ingredient is coffee. You can even go and search for espresso coffee beans as we are trying to brew espresso here. This ingredient has to be freshly roasted, of high quality, and not only the coffee but the grind also.
Coffee quality is up to you, choose the one you like as best, but the grind has to be quite specific. Making Espresso always requires a finer grind, going as fine as table salt. If the coffee starts sticking together into a uniform mass when water is added, you will know the grind is right.
For each double shot of espresso, the dose can go from 18 grams to 21 grams, depending on the coffee and the machine. So your best bet is to try it out; find what tastes the best for you; and what your device can do with each dosage.
You might like to read: Best Espresso Beans
Equipment & Machinery
For the instruments needed in the orchestra of taste, you will need the following:
- Espresso Machine: Make sure that this is a specialized espresso machine, features quality built and components, as well as an excellent pressurized system. You can take help from our buying guide about espresso machines.
- Grinder: If grinding your coffee at home, make sure that you are grinding it as fine or finer than table salt.
- Tamper: To compress the coffee before putting it into the machine. This always helps to bring most of the taste out of your coffee and to prepare it correctly for the best extraction.
- Filter: It depends on your machine, but this is a critical part to consider.
- Knock Box: To dump the puck out of the used espresso cake.
- Weighing Scale: It will make sure everything is at the correct level, so you can replicate whatever you are doing right. And also something to check the espresso when it comes out, like a measuring cup, to make sure the machine yield is on point and see what changes as you evolve.
How To Pull An Espresso Shot
Now that we have all the basics in place, it is time to make that great shot. I will make a step-by-step guide down here and just follow it and adapt whatever you need to adjust.
- Water – Depending on your machine, fill it up or hook it to the waterline. Make sure it’s room temperature, as the machine will handle the heating part. Distilled water is not recommended as most machines can take damage with this. A carbon filter works best to keep the water in the right spot. If the water is not good enough, you may have to boil it or purify it with tablets.
- Let the Machine prepare – Making espresso is fast, but the machine has to be ready for it. Each machine works differently when it comes to this. Make sure you are giving it enough time to heat up. The time for this is usually from as little as 10 minutes to even an hour (for very big machines, mostly commercial). Please refer to your machine’s manual for this time, as it varies from one to another.
- Make a Test Run – Doing a test run will prepare the machine for the real thing. It will bring all the components to the desired temperature. Lock an empty portafilter in the machine and give it the test run, this should bring water to the system and prepare everything to go. Also, you may be able to notice any issues at this point.
- Prepare the Coffee – This is where the grind comes in if you are getting the ground coffee from somewhere else, make sure that it’s correct. Grind the coffee until it looks like a powder, but it still generates some friction if you rub it between your fingers. It is quite a specific point but, believe us, it’s worth it. Measure 13 to 21 grams (depending on your taste and the machine/coffee you are using) and place it in the portafilter. Make sure that the grounds are settled in the basket, using your finger to level the coffee, filling any empty spaces gently.
- The Tamp – Use the tamper to compress the coffee. Twist it with your whole arm and making sure that you press it evenly. Use your fingertips to guide yourself and inspect the coffee to make sure it’s leveled.
- The Brew – Lock the portafilter now, and use the machine as it’s supposed to (running thru any stages it may need for brewing, like pre-brew). Use predetermined brew yield, which is usually about 2 ounces. The pour should take around 25 seconds if this time is not right, then the grind size may be off. The ideal temperature is around 200ºF.
- Liquid Delight – Now that the brew is complete, behold that delicious result. Some people like mixing the crema by stirring the espresso or changing the recipient, but it’s really up to you. Use the knock box to puck out the used coffee.
| # | Preview | Product | Price | |
|---|---|---|---|---|
| 1 |
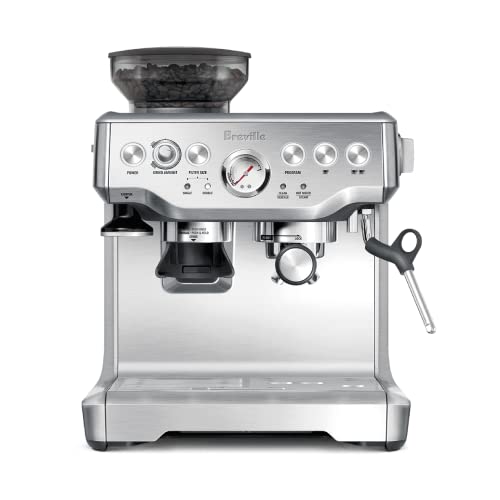
| Breville Barista Express Espresso Machine... | $749.95 $696.99 | Buy on Amazon |
| 2 |
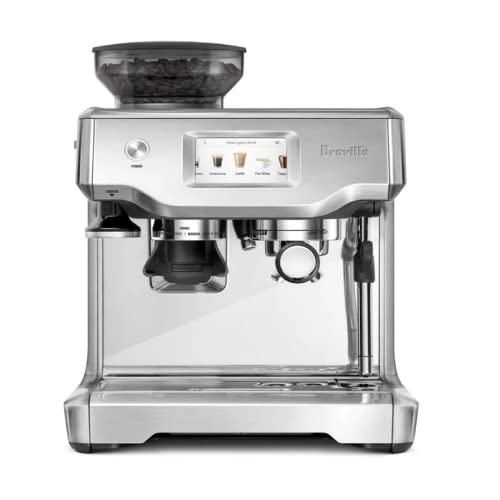
| Breville Barista Touch Espresso Machine... | $999.95 | Buy on Amazon |
| 3 |

| CASABREWS Espresso Machine 20 Bar,... | $139.99 | Buy on Amazon |
The result should be great as long as everything goes right. Make sure to taste this cup. It will tell you if the amount of coffee used was the right one, as well as the grind size. Usually, if the size is too coarse, the taste will be sour; and if it’s too fine, the flavor will be bitter, so adapt to it based on the final result. A general rule of thumb is:
18 grams of coffee in, 36 grams of espresso comes out within 25-30 seconds! If it pulls under 25 seconds, the grind is too coarse or if it goes over 30 seconds, it’s too fine.
If overall, you think the method is overwhelming and not for you, we suggest using a machine that does all the tedious work without much intervention, say the automatic one. However, they are going to burn a big hole in the pocket.
Bonus Tip – Milk Frothing
If you want to make a cappuccino or a latte, steam milk is what you need. There are some kinds of milk like oat, soy, and almond that can work correctly. Some have barista-made versions, but in my opinion, the best is just whole milk. Fill the pitcher and make sure that there is enough space for the steam. So don’t fill it all the way, leave around a finger between the milk’s top and the serving spout.
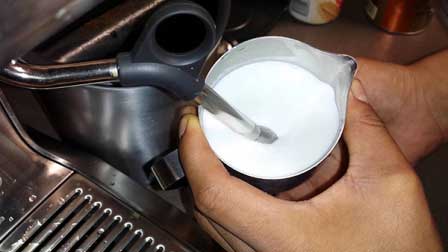
When steaming, make sure that you reach that perfect point where you are getting a beautiful foam, without big bubbles. Also, feel the milk’s temperature when holding the pitcher. This is something you must practice before becoming a pro.
Troubleshooting Guide
- Pour Time – If your shot took too long or too little (Base is around 25-30 seconds) then maybe the ground is either too coarse (fast) or too fine (long).
- Taste – Is it bitter? Is it sour? Or just plain strange? Temperature and brew time can affect this as well as grind size.
- If it’s bitter, make sure the water temperature is not exceeding 200ºF. 205 is fine, but 210 can start causing issues. If the brew time was too long, it could also cause this.
- For sour, make sure the temperature is not too low, and the brew time is not too short. You may be wasting a lot of taste from your coffee with this wrong.
- For strange, if your coffee tastes like it shouldn’t, it could be contamination, or it could be uneven flow when extracting. Make sure the coffee is leveled when locking and everything is sealed without any kind of leaks or holes.
- Consistency – from water espresso to crema, this should be fixed immediately.
- If your shot is way too light and watery – you can decrease the yield, increase the coffee dosage. Compress harder with the tamper, use a finer grind or even use fresh coffee.
- When the crema is barely there, your coffee could be old. Maybe there is not enough pressure in the puck – increase the dosage, get a finer grind or get fresher coffee.
- If there is an excess of crema, there is a chance that your coffee is too young and fresh. Also, the gas from the roast process is still present – To fix this, usually, just let the coffee sit for 2-3 days, and it will be ready to go.
Wrapping Up
We hope that the above guide has taught you well about pulling an espresso shot at home. We have tried to include all the important steps so that you are not left confused in between.