What can give your day a better start than a freshly brewed cup of flavorful coffee? Moreover, when you have a Keurig at hand, nothing can stop you from making yourself the best coffee that delights you like anything.
Are you wondering how to do that? Well, read on, and we will give you a complete guide about how to descale a Keurig, why it’s essential, and much more!
By reading the guide below, you’re going to keep your little coffee maker in the pink of health! Hang in there, and you’ll know it all!
Why You Need to Descale a Keurig?
Now, don’t just think of Keurig as a machine that requires tuning up at regular intervals. There’s a difference between a machine we use for convenience and the one we use for gratification. Coffee aficionados can decipher this pretty well. Moreover, failing to descale your Keurig regularly might turn your machine into a residence for bacteria, germs, and other microorganisms.
In fact, many times, calcium and other hard water minerals too start accumulating in your machine, which affects the taste of your coffee massively.
Apart from that, your machine may take longer to brew than it generally does. So, to avoid such unwanted circumstances, it is always a wise idea to descale a Keurig.
How To Descale A Keurig?
Let’s now head over to the method used for descaling or cleaning your Keurig coffee maker. One can use a proper descaling solution available or else can also use vinegar to do the task. The methods vary a little and we will be discussing both of them. Let’s first start by descaling the Keurig using a descaler.
Descaling a Keurig Using Descaling Solution
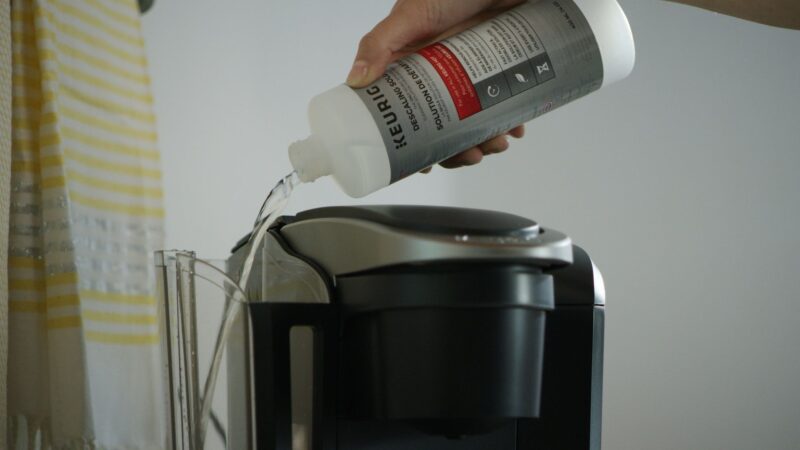
A descaling solution can be easily purchased online or is readily available in stores. It is odorless and helps to remove all unnecessary deposits from your Keurig easily. To effectively use this solution on your coffee maker, here’s what you need to do.
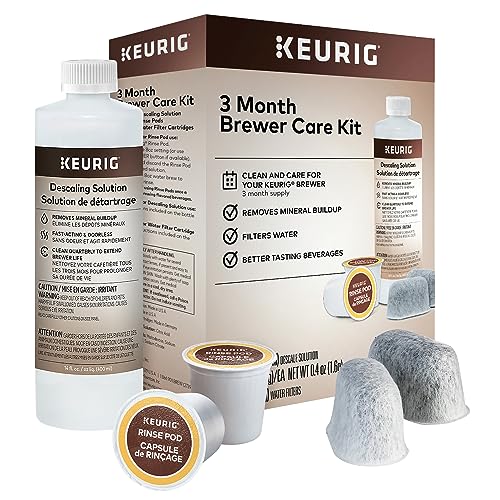
- INCLUDES: 4 Keurig Rinse Pods, 1 Descale Solution, and 2...
- RINSE PODS: reduces flavor carry-over between brews
- QUICKEST WAY TO CLEAN YOUR K-Cup pod holder: rinse away...
- EASY TO USE: use just like you would a regular K-Cup pod
Step 1:
First, keep the Keurig descaling solution handy, then take a ceramic mug (large). Also, keep close access to your sink while cleaning your coffee maker.
The ceramic mug will help you empty the sediments that are deposited inside your coffee machine.
Step 2:
Once you finish arranging the things as mentioned earlier, it’s time to empty the coffee maker/ Keurig water tank. You would also have to make sure you are removing the k-cup in the brewer.
However, you may keep the funnel and cup holder inside the brewer while performing this step.
Step 3:
Now, you need to switch off the automatic shut-off feature. This is imperative because when you pour the solution into the brewer, you would have to keep it on for some time.
Step 4:
Once done, take out the solution and put it into the machine reservoir in a 1:1 ratio. You need to take one part of water and then mix one part of the descaling Keurig solution.
Step 5:
At this step, click on the large button where you get yourself a big cup of coffee. You can quickly get it in the button section area.
Step 6:
It’s time to run the machine. Soon you’ll be seeing dirt and other mineral deposition in the cup, all of which implies that your favorite beverage machine is getting an excellent cleanup.
Step 7:
Continue with the process unless your water tank is implying that it is running out of solution. Mostly, all Keurig machines indicate it through the ‘ADD WATER’ notification.
When the machine indicates that it is running out of water, allow the solution to remain in the machine for about 30 minutes. By doing this, a spell will be done on your machine.
Step 8:
After this, you need to clean the machine. Use fresh water to cleanse the machine thoroughly. Once this is done, you need to run the brewing option once more.
This step allows you to ensure that no leftover sediments or solutions are present in the coffee machine. You can try out this process two or more times, just to be sure that your cup doesn’t contain any cleaning solution.
Once you’re done with that, Voila! Your coffee machine is at its peak to serve you premium quality cafe-like coffee!
Descaling a Keurig Using Vinegar Solution
Not all the time, we have the best solution available. Nevertheless, you can always go for some easy ingredients that are readily available in your kitchen!
You can use vinegar solution and descale a Keurig and make it work at its best performance. Are you wondering how to do it? Well, here comes the answer!
Step 1:
Vinegar can work like magic as a cleaning agent. All you need to do is, take some vinegar, a ceramic bowl and go ahead with the cleaning process.
Step 2:
Start by emptying your coffee maker. Chuck out all the leftover coffee pods and take out the leftover water from the coffee reservoir. Then, you can take a damp cloth and gently wipe out the residues that you can see before starting with the descaling process.
Step 3:
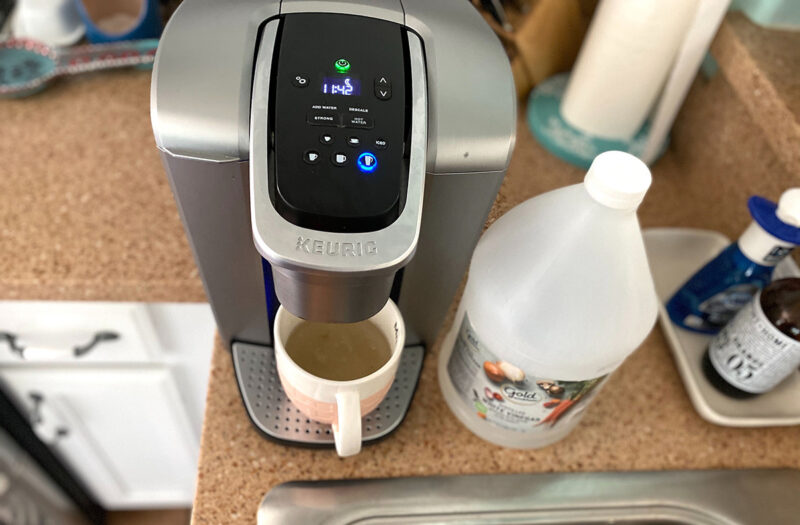
Take some water and vinegar in a 1:1 solution and fill up the reservoir of your coffee machine. However, always make sure you don’t add raw vinegar.
If you add raw vinegar into your coffee machine, you might end up destroying many of its internal parts. So, be careful about this!
Apart from using regular vinegar, you can also go for apple cider vinegar. However, it is important to rinse it quite a few times while using ACV.
Another solution you can vouch for when deciding on cleaning your Keurig machine is citric acid. That too is an excellent natural ingredient, which can clean your coffee machine quite well.
Step 4:
Now place the ceramic mug in the dedicated area. Run the machine and see how the sediments start pouring onto the cup. Don’t miss out on clicking on the large cup button when you’re doing this!
Step 5:
Always keep note that vinegar possesses acetic acid that can clean your machine efficiently. Wait until the ‘Add water’ indicator comes on, and then allow the vinegar to sit in the machine for quite some time.
Ideally, you can allow the vinegar to sit for around four hours. Since you’re not using a solution, it is crucial to perform this step. Once you are done with that, it’s time to go on to the next step.
Step 6:
Here, you need to throw out the residue vinegar solution and start washing the machine using clean water. And this is indeed a critical step. No one likes their favorite beverage to taste like vinegar. Do you?
Well, then you need to make sure that you are performing this rinsing process quite a few times. In case you’re thinking of using ACV, you would have to try out this process quite a few times.
Alternative to Vinegar
Another alternative to vinegar, which you can consider quite potent and helpful one is lemon. All you would have to do is replace the descaling solution or distilled vinegar with one part of the plain water. And then, simply follow the process we have mentioned above!
Wrap Up
Hope this helps, and you’ve finally got to know how to descale a Keurig. What’s holding you back then? Before brewing your next cup, don’t miss to check if your Keurig is calling for a descale, and in case it is, apply the hacks mentioned.
When you descale your Keurig, it works almost like pampering a mischievous kid so that he obeys you. For anyone whose heart is bearing an immense love for coffee, the machine brewing the cups is no less than a child. Indeed, taking good care of them is paramount, and Keurig is not an exception. Descale it periodically and help it brew cups that blow your mind away!
FAQs

When it’s about the welfare of our treasured gizmo, we always have innumerable questions ticking in our minds! Here are the most common ones answered.
Can a Keurig Ask For a Descale Even After I have Descaled it?
Well, yes! This is a common malfunctioning that might occur in your coffee machine. And it might mean that something inside the device is not allowing the flow of water.
What is an Alternative to Descaling Your Keurig?
To keep it straightforward enough, there is no alternative. A descaling is more than vital for your Keurig. Additionally, you need to keep in mind that while natural cleaning agents like vinegar and lemon can clean the Keurig well, it is always necessary to use the descaling solution once in a while.
How frequently should I clean my Keurig?
Ideally, you should descale your Keurig every three months. It helps you ensure the optimal functioning of the machine. However, in case you use it once in a blue moon, you can clean it every six months.
How to reset descale on Keurig?
After the descaling and cleaning process, press and hold the 8oz and 10oz buttons for 3-5 seconds. This will turn off the light.